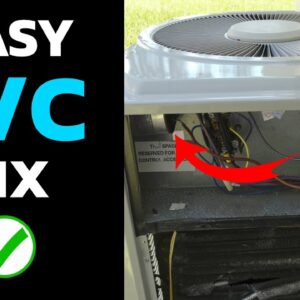
Welcome to the Guide on Fixing a Common AC Problem: Non-Starting Unit
Let’s face it; a working air conditioner, especially during the summer, is a blessing. However, this blessing can easily become a nuisance if it stops working. Hey guys, welcome back and today, I’ll be sharing a common AC problem and how to fix it.
The Most Common Reason Why an AC Unit Doesn’t Turn On
Here’s one most common issue – the outside unit not starting. It buzzes and appears to be attempting to start, but just won’t. Luckily, I’ll show you a quick DIY fix.
What You Will Need
For this DIY, you will need either a 5/16 or a quarter-inch nut driver, or a Phillips screwdriver. This tool will assist you with removing the screws that hold the exterior panel of your unit. You might also need needlenose pliers, a drill with the 5/16 bit, and an electrical meter.
The DIY Process
Locate Electrical Components
Once the necessary tools are acquired, it’s time to get your hands dirty. Start with locating the electrical components. Follow your electric whip from the air conditioner and identify where the wires come in. This is where you’ll find your components under the external panel.
Disconnect Power Supply
Before you start tinkering with the unit, disconnect the power. There’s typically a plug or circuit breaker inside a box outside that you can yank out or flip off, respectively. This disables the 220 volts rushing to the air conditioner, making it safer to proceed.
Exposing the Capacitor
Next, take off the panel using the screwdriver or the drill with a 5/16 bit. Underneath it, you might encounter dust and debris gathered over time. Brush this off for a cleaner workspace. Underneath this dust, you’ll see the capacitor; this is often the part that fails when your AC doesn’t start.
Handling the Capacitor
The capacitor stores a charge, so touching it might cause a small shock. Discharge any residual charge using the metal part of a tool. Afterward, you can safely dislodge it using the nut driver and inspect it.
Identifying Capacitor Failure
A faulty capacitor often has visible signs. It will either bubble up at the top or in worst cases, the entire top blows off, releasing dielectric grease.
Replacement
If you determine that the capacitor is faulty, note the color of the wires attached to it. This is necessary since you need to ensure that the replacement is correctly interconnected.
Measuring Micro Farad Reading
Next, find the microfarad (UF) rating; this is the size of the capacitor. Typical ratings include 35 + 4, with the larger number belonging to the capacitor and the smaller to the fan. When ordering a replacement, ensure it matches the current (faulty) capacitor’s rating.
Installing the New Capacitor
To install the new capacitor, plug back the wires being cautious to restore them to their original positions. After fitting the wires back correctly, broaden the bracket to accommodate the new capacitor and fix it firmly.
Testing
Once you’ve installed the new capacitor, it’s time to test it out. Restore the power supply, but remember a little spark might occur when you plug back the connection. If your electrical company has installed a saver switch, there will be a delay of about 5-15 minutes in the start of the air conditioner.
Conclusion
There you have it – a common reason why your AC isn’t starting and how to fix it. Most AC repair calls are often due to capacitor problems, and hopefully, with this guide, you can fix this problem by yourself.
Up next
There is a plethora of issues that can affect an AC system. Have you ever had an AC problem that you were able to fix on your own? We would love to hear about how you did it. Remember, your experience might be the solution someone else needs.
Until next time, keep cool and never stop learning!

