DIY Mini Split Installation: Reflections, Updates, and Recommendations After One Year
A little over a year ago, I undertook the installation of a mini split system in my shop. I chose to take the full DIY route, relishing the opportunity to tinker and save some money by doing it myself. Looking back, though, I have a few regrets about the process and some areas where I wish I had done things differently. In this article, I’ll share my top three regrets and the lessons I learned from them, along with an update on how the mini split has performed over its first year of use through a harsh winter in Utah and a scorching summer.
Regret #1: Skimping on Line Covers
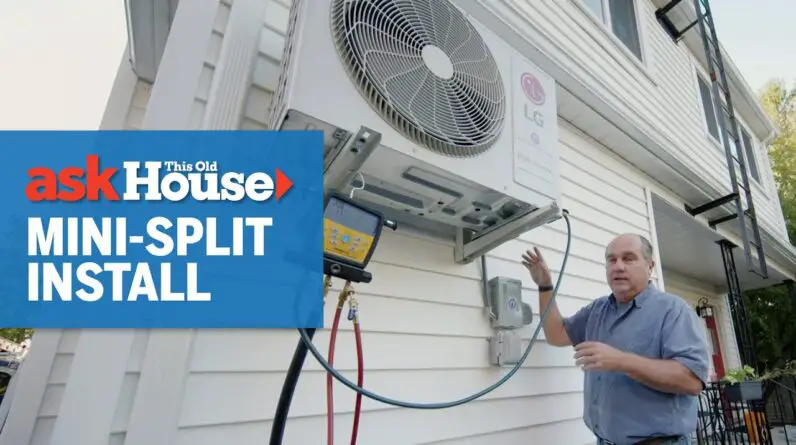
One of my first regrets was not opting to spend a little extra money on line covers for the exterior part of the installation. When you install a mini split system, you typically wrap the lines with UV-resistant tape. I did this, but over time, I noticed some fading on the tape, which indicates that it’s starting to wear down. Not only do the exposed lines look a little sloppy and unprofessional, but I’m also concerned about their longevity.
Line covers, which you can find for under forty dollars on sites like Amazon, provide an extra layer of protection against the elements. These covers can make a huge difference in the overall appearance of the installation, making it look cleaner and more intentional. My wife often teases me for using the word "intentional" a lot, especially when it comes to projects like landscaping. However, there’s something satisfying about knowing things were done on purpose and look sharp as a result. This principle applies to the mini split installation just as much.
Moreover, the line covers are not just for aesthetics. They’ll help protect the lines from wear and tear, such as UV damage, rain, and snow. I’ve ordered my set of line covers, and I’m excited to install them to give that finished look to my system.
Regret #2: Inadequate Electrical Planning
My second regret, which is arguably the most significant, concerns the electrical work I did for the mini split. In my initial install video, I didn’t use the proper wiring. The system came with 16-gauge wire, but I wasn’t comfortable using it for my 230-volt unit. Instead of going out to buy the appropriate 12-gauge THHN wire—it would have cost a bit more—I decided to use some 10/3 wire I had lying around.
This decision led to a couple of problems. Firstly, running Romex through EMT (electrical metallic tubing) is not recommended; THHN wire should be used for this purpose. Secondly, I didn’t need 10-gauge wire for this application; 12-gauge would have sufficed and been far more appropriate.
The mistakes didn’t stop there. I used the black and white wires because I was accustomed to that setup, even though the system required two hot wires carrying 120 volts each, meaning I should have used black and red wires. This incorrect wiring wasn’t inherently dangerous but was not the correct procedure either.
Another concern that was heavily mentioned in the comments on my video was the circuit breaker. Because I used 10-gauge wire, I installed a 30-amp circuit breaker. However, the unit only required a 15-amp breaker, which would have limited the power running through and been the safer choice. This is a relatively easy fix that I will need to correct by swapping out the 30-amp breaker for a 15-amp one.
It’s these sorts of oversights that emphasize the importance of thorough research and planning, especially when dealing with electrical installations. Despite there being no current issues, it’s always better to err on the side of caution and follow proper procedures to avoid potential risks.
Regret #3: Not Properly Handling the Coils
My third regret involves the handling of the refrigerant lines. Initially, I didn’t take the necessary steps to cut the lines to the perfect length, flare them correctly, and remove any excess. I left vertical coils in my installation, an oversight that could lead to the pooling or aggregation of oils or liquids inside, thereby reducing the system’s efficiency.
A better strategy to address this issue without cutting the lines is to lay the coils out horizontally. This simple adjustment prevents pooling, helps the system run more efficiently, and supports long-term functionality. I also chose to keep all lines and coils off the ground to facilitate easy trimming around the area and to prevent any vegetation from interfering with the system.
This minor but crucial change can greatly enhance the system’s performance and extend its lifespan, ensuring it runs smoothly for years to come.
Performance Update: Year One in Review
Despite these regrets, I have to say that the mini split unit itself has performed admirably over the past year. The unit has proven itself through some extreme conditions—keeping my shop warm during a record-breaking snowy winter in Utah and cool through a summer that has hit 90 degrees and higher.
One of the most convenient features I leveraged is the ability to control the system via a smart device. In my previous videos, I mentioned using the Sensibo device to integrate the mini split with my smart home setup. This allowed me to issue voice commands to set the temperature, turn the unit on and off, and adjust other settings. While this functionality has been incredibly handy, I did mention wishing that the Wi-Fi integration was built into the unit itself.
I’m pleased to report that the company that makes my unit, Tosot, now offers models with built-in Wi-Fi integration. This enhancement makes it even easier to manage the system remotely without needing any additional devices. The convenience this provides, particularly for adjusting temperatures without physically being present, cannot be understated.
Reliability and Functionality
Over the past year, the mini split system has been reliable and effective in both heating and cooling my shop. During the harsh winter months, when temperatures dipped significantly, the unit efficiently maintained a comfortable 70 degrees indoors. It was equally adept during the hot summer months, ensuring the shop remained cool despite the sweltering temperatures outside.
The main issues I’ve encountered have been related to maintenance, such as clearing cobwebs and ensuring that the system remains free from obstructions. However, these are minor inconveniences compared to the overall performance benefits the mini split has provided.
Purchasing Options and Recommendations
For those interested in purchasing a similar mini split system, there are a few options available. Tosot units can be purchased directly from their website or through online retailers like Amazon. When comparing prices, I found that Amazon often offers competitive rates, but it’s worth checking both sources to find the best deal.
Additionally, while Tosot is a reliable brand, there are other reputable companies like Mr. Cool that offer user-friendly installation processes and excellent customer support. I provide affiliate links in the description of my videos to help others navigate their options and support my channel, although these recommendations are based purely on my personal experience.
Final Thoughts
Reflecting on my DIY mini split installation experience, I recognize the importance of preparation, research, and attention to detail. While taking the DIY route can be rewarding and cost-effective, it’s crucial to follow proper procedures and use the right materials to ensure safety and efficiency.
Despite my initial regrets, I’m incredibly satisfied with the performance of my mini split system. It’s proven to be a reliable and efficient solution for climate control in my shop, offering the convenience of smart home integration and the capability to handle extreme weather conditions.
For those considering a DIY mini split installation, I hope my reflections and recommendations provide valuable insights and help you avoid making the same mistakes. Whether you’re motivated by the challenge of a DIY project or looking to save some money, careful planning and proper execution are key to achieving a successful installation.
Before embarking on your own installation journey, be sure to watch my original install video where I walk through every step of the process and address some common pitfalls. Additionally, you can check out my video on the three things I wish I knew before starting the installation to gain further insights and tips.
Thank you for joining me on this reflective journey, and I look forward to sharing more DIY projects and updates in the future. If you have any questions or suggestions, feel free to reach out. Together, we can continue to learn and grow in our DIY endeavors.

