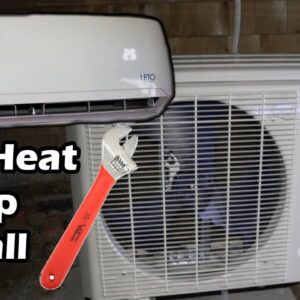
DIY Mini-Split Heat Pump Installation Guide
Hello everyone! I’m delving into a fascinating project today, installing my own mini-split heat pump. I selected one of the most sought-after brands for the do-it-yourselfers out there, Senville, specifically, the 9000 BTU unit. Should you be interested, it comes in both 240 volt and 120 volt models. My preference is the 120 volt model, but rest assured, the installation steps are largely equivalent, save for some differences in wiring.
A Few Caveats
A word of caution: tackling this project independently could mean that the warranty won’t cover any damage unless a certified HVAC professional releases the refrigerant. So, keep this in mind and definitely, check your local building codes before you commence the installation. It’s always best to seek assistance from an authorized electrician or HVAC specialist when needed.
Embarking on the Installation
Mapping Out The Placement
Alright, so to get a sense of where to position the unit, I’ve designed a little blueprint of the heat pump. It’s not exactly top-mounted due to the limited ceiling space in my bedroom; however, it’s the best possible fit I could achieve. So, fair warning, your heat pump might not achieve its optimal efficiency with similar arrangements.
Prepping for the Installation
The head unit’s rear houses our supply lines, or in other words, the refrigerant lines. After unearthing these, you’ll see the drain tube. My plan is to use a pre-drilled opening in the wall leading to an accessible location outside, this eliminating the need to remove either of the knockout panels on the heat pump’s sides. Attention must be paid while manipulating the copper pipes as avoidable stress might result in undue damage. With this handled, I’m setting up the lines to be wrapped up along with the electricals previously discussed.
Addressing Wiring Discrepancies & Installing Lines
Interestingly, the wire colors don’t correspond between the outside unit and the head unit of the heat pump. Thankfully, the numbers on both ends match; specifically, heat pump units utilize a blue wire while the head units employ a white wire. Knowing this can help ensure a secure connection.
Sizing up, I have a 25 feet copper line prepared to divide into a high-pressure line and a low-pressure line. In case you opt for a span longer than 25 feet, please remember to have your HVAC professional add additional R410A refrigerant. The standard kit comes bundled with refrigerant that suffices for 25 feet – no more, no less. Remember, in scenarios where you have to shorten your lines, you might need to have some refrigerant removed.
Planning for All Weather Conditions
My setup features a custom flange and a mini-split cover flange, enabling me to seal holes and shield the heat pump from the elements. During warmer weather, I’ve channeled the drain tube to collect water from the AC mode, which I then use for my plants. Used clay to seal the hole, which is more manageable to remove if required, as compared to caulking or spray foam.
Getting Down to the Core Installation
After positioning the outdoor compressor unit correctly, adhering to all clearance norms, I elevated it a few inches using a solid pad, which allows room for the drain plug and hose at the unit’s base. As winter snow accumulation isn’t an issue for my locale, I’ve not bothered with a stand. However, it might be a good idea for those who experience heavy snowfalls to consider stands for their units.
Tightening Up All Loosened Ends
The next part involved employing nylog fitting sealant to the flare fittings and flange and hand-tightening the flare nuts. After that, all that was left was connecting the lines to the main compressor unit, installing the outdoor compressor unit, and redirecting the drain tube.
Checking for Leaks and Releasing the Refrigerant
Our course of action started by pulling a vacuum on the low-pressure side of the unit and leaving it for a satisfactory period. Leak tests were then performed on all the fittings by employing some soapy water before releasing the refrigerant and wrapping up the lines.
The Final Test
The moment of truth came with the final test. Despite the external temperature being roughly -6 degrees Celsius, the indoor unit’s heat pump was able to reach around 40 degrees Celsius, a huge gain! The outdoor unit performed brilliantly as well, maintaining stable temperatures even in undulating streams of air.
Concluding thoughts
All said and done, a few things are worth repeating. Your warranty is not covered unless an HVAC tech signs off on the installation. Make sure to check for leaks, use a vacuum pump and gauges to prepare the refrigeration lines, and follow the instructions diligently. When in doubt, consult a professional to do the install.
Most importantly, have fun with the project! I hope you found this video walkthrough informative. If you have more questions or need a step-by-step guide, drop a line in the comment section below. Looking forward to seeing your creative DIY efforts. See you in the next one!

