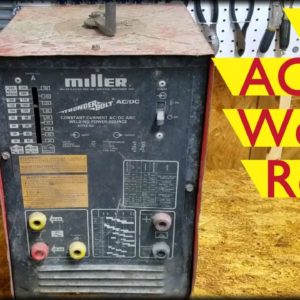
Today on Mike attempts, bringing an old
Miller Thunderbolt back to life. This 38 year old Miller Thunderbolt a AC/DC welder was made in 1982, before they even started using their current logo. It was
kindly donated to me by a nice guy who just never got around to fixing it. From
the outside, besides being filthy, the amperage
selection crank won't move. Let's see how it looks on the inside. Yikes! Looks like we got some mice nests made
from insulation, plenty of rust, and even a snake skin! The shunt rails are pretty rusty, which
is why it won't move.
After lots of WD-40 and elbow grease, I'm
starting to make some progress. I was able to loosen 2 of the 4
anti-noise blocks on the sides of the shunt. In hindsight, I should have
loosened them from the start. I think it would have made things much easier
without putting so much strain on the crank. Completely removing the shunt
would have been even better but I don't know if I could have disassembled it
without breaking something. I hit the shunt rails with some sandpaper
for the more stubborn rust. And finished them off with a little Dremel
wire cup brush. Now the crank is nice and smooth. I
applied a thin layer of high temp grease to help prevent future corrosion. It's
looking a lot better. I'm pretty sure these wires are from a repair. Same with this copper ground strap. The
negative DC jack plug receptacle is melted. It melted the nylon washer on the
inside too. So, it looks like the repair with the
copper bar might have been putting strain on this receptacle.
The insulating
plastic threads broke which then allowed contact with the metal case. You can see
where it melted a bit of the metal too. And arc marks on the inside. Luckily, it looks like the mice only
chewed some of the insulation from this black fan wire. A little electrical tape
and we're good to go. Here's the new jack plug receptacle. I used the old nuts so the ground strap
would still fit properly. To see if it'll even turn on, I have to
change the plug so it'll fit my welder outlet. Well, the switch works but the fan sounds a bit rough. After cleaning
and lubricating the fan shaft, it sounds much better.

The welder didn't come with any leads so
I had to make some just to see if it'll still weld. The new stinger is rated at 500 amps and
I didn't consider how it would fit smaller gauge wire. I ended up taking the
wire out again and doubling it back on itself for a better fit. I don't have a big enough crimper so I
used a small nut and the vise to crimp on the lug. This Lincoln ground clamp was only $6
bucks. It has a really strong spring and seems well-made.
The new jack plug is
tight and all of the receptacles except DC positive. Luckily, this was an easy fix. The hollow threaded brass tube just wasn't screwed all the way into the end cap. Time to test it out! DC works! And AC works too! That's my first AC weld
ever. Looks like I was going a bit fast on DC. I finished burning the rod and I'm
happy with the results. Now that I know it works,
let's pretty it up a bit. I straightened out the sheet metal the
best I could, slapped on some paint, and installed some new casters.
See the description below for the parts and tools I used. Feel free
to rate this video, add your comments and questions below, and subscribe for more!.

