Understanding Split System Installation
Today, we’ll be delving into the intricate process of installing a split system air conditioner, which can vastly improve the comfort level of your home or workshop. This comprehensive guide will walk you through the steps and procedures involved in this endeavor, ensuring you’re well-prepared for each intricate aspect. With clear instructions and illustrations, you’ll soon have a cooler environment in which to work or relax.
Finding the Suitable Split System
When embarking on the quest for an appropriate split system, you’ll need to consider its capacity and power requirements. For instance, a one-ton unit that offers 12,000 BTUs can effectively cool approximately 700 square feet of space. But the power source should not be overlooked; a 110V unit might suffice for smaller installations, but multiple or larger units may necessitate more robust electrical service options.
Taking Care of the Electrical Requirements
Once you’ve determined the specifications of your split system, the next step is to address the electrical components. Wiring and breaker considerations need to be made, and connecting to your main breaker box is vital. Remember, electricity can be dangerous, so if you’re unsure, it’s essential to consult a professional to help reduce the risks associated with electrical work.
Depending on your specific installation, you may find it convenient to use armored cable instead of conduit, as this can simplify the process in certain situations. The key factor is to ensure the wiring carries the necessary wattage for your system and is connected to the appropriate dedicated breaker. For example, a 20-amp breaker can support a one-ton unit with 12,000 BTUs.
Preparing for the Installation
The infrastructure of your site plays a crucial role in the efficiency of the installation process. Proper insulation of walls, ceiling, and doors can aid in the effectiveness of your split system. Don’t forget to factor in the hole height to accommodate the wiring and components required for your particular setup.
Additionally, you need to establish a watertight connection both inside and outside your space. This precaution extends to the sealing of conduits, ensuring moisture and pests don’t gain access. The installation of a quick-disconnect power box outside your space is helpful, allowing for the termination of power to your unit if and when needed.
Mounting the Indoor and Outdoor Units
Installing the indoor unit requires careful calculation of hole locations. After an accurate marking of the hole for drilling, leveling and securing brackets is essential. Getting the correct hole size is crucial; consider using a hole larger than the manufacturer’s recommendation to accommodate the conduit properly.
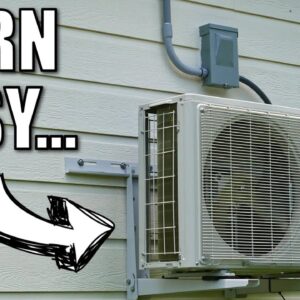
For the outdoor unit, a universal bracket will suffice, supporting the system off the ground. This method helps keep the unit clean and avoids potential damage from mowing. Alternatively, a concrete slab may provide better vibration absorption, but it is less aesthetically pleasing.
Connecting the Refrigerant Lines and Electrical Components
When it comes to connecting refrigerant lines, precision is key. To achieve optimal performance and prevent leaks, ensure the flaring connections are torqued appropriately and applied with the proper sealant. Remember, leak detection is imperative during this phase, so don’t hesitate to invest in testing tools or consult professionals as needed. Properly connecting the electrical components at both indoor and outdoor units and setting up your control panel is critical for a safe and efficient split system.
Finalize the Setup and Test the System
Once everything is connected, perform a thorough vacuum test on the refrigerant lines to verify system integrity. Should there be any leaks, a swift investigation and resolution process is critical, ensuring the reliability of your system. After resolving all potential issues, switch on your system and enjoy the newfound comfort of your air-conditioned space.
In conclusion, a proper split system installation involves an amalgamation of intricate steps and attention to detail, from electrical wiring to refrigerant lines. By adhering to the guidelines outlined above and recognizing potential challenges, the process becomes manageable, ensuring you achieve a comfortable environment to appreciate all year round.

