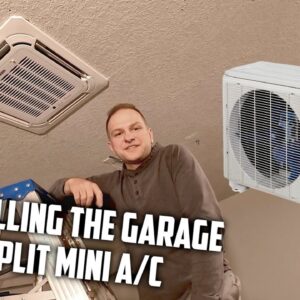
Installing a 220 Volt HVAC System: Ceiling Cassette Mini Split
An Overview of the Pioneer Split Mini
During the latest episode, we centered our attention on setting up a residential HVAC system – a 220-volt, 20.5-SEER, 18,000 BTU Pioneer Split Mini. This type of air conditioning system diverges from the typical wall-mounted mini splits, as it is designed to be a ceiling cassette unit. The ceiling installation allows for air to be circulated in eight different directions, providing an effective way to heat or cool a room. This solution is perfect for applying epoxy on floors, as the temperature conditions can be efficiently maintained.
Getting Started: Measuring, Cutting, and Adjusting
The first step is to find the perfect spot for the cassette unit, ensuring it is centered in both width and length within the desired space. The cassette measures 22.5-inch square, which fits perfectly between standard 24-inch joist spacing in residential construction. Mark the measurements carefully and utilize a saw to cut out the appropriate square space in the ceiling drywall.
One challenge we faced during installation was due to the joists not being parallel, which required us to make adjustments by using clamps to push and pull the joists into place. After trimming excess drywall and securing new sheetrock screws, the layout was corrected and prepared for installation.
Creating Custom Brackets
To securely attach the cassette unit, we crafted custom brackets by drilling three holes: one three-eighths hole and two quarter-inch holes. The brackets can be easily screwed to the sides of the joists, serving as a sturdy connection to hold the unit.
Assembling and Testing the HVAC System
The next tasks involve wiring the system and installing the outdoor components. Before proceeding, create an appropriately-sized hole through the roof line to enable easy wire and pipe routing. The electrical work can be completed quickly and the focus can be shifted to constructing a mounting frame for the outdoor unit.
Once the holes have been prepared and the outdoor unit has been mounted, proceed to connect the high side and low side lines, as well as the power lines. Additionally, you will need to attach the drain hose and provide a connection between the drain line from the unit and the hose.
A vacuum pump will then be used to evacuate the system through a vacuum port, ensuring there are no leaks by verifying whether the vacuum holds. Finally, the refrigerant within the unit can be released through valves installed on the lines.
After completing the electrical connections and testing the system, ensure that the unit is functioning efficiently. Do a final check on the air produced, ensuring that it is heating or cooling as required.
Finishing Touches
Although our installation was successful, a few minor adjustments may still be necessary, such as insulating the pipe connections and organizing the outdoor components. These tasks will ensure the system operates flawlessly.
In Conclusion
While installing an HVAC system like the Pioneer Split Mini Ceiling Cassette may be an involved process, the results are well worth the effort. By following this guide, you will have your room perfectly temperature controlled and enjoy the convenience that these systems provide. In the next episode, we will explore the application of epoxy on floors. Don’t forget to stay tuned, and feel free to share, like, and subscribe so you won’t miss any informative content.

