Introduction
Hey everybody! In this article, I want to share with you an interesting experience that I had recently regarding the installation of a mini-split air conditioning system in a sunroom. I thought it might be useful to share this experience since it could potentially help someone else in a similar situation. So, let’s dive into the story.
The Problem
I received a phone call from a homeowner who had just had a beautiful sunroom built on the back of their house. Unfortunately, they had been unable to enjoy their new addition to the home because it was too hot without air conditioning. The company that built the sunroom suggested installing a P-Tech unit through the wall, but the homeowner was not interested in that option and started looking for another solution. That’s when they found and contacted me.
Challenges with Previous Jobs
I have experience with installing mini-split air conditioning systems and have done three such installations in the past three weeks. However, each of those jobs came with their own level of difficulties. I’ve had to work on top of a high ladder with windows on both sides, while using a hammer drill to go into brick with one hand and trying to hold on to something with the other hand. It was dangerous and nerve-wracking, but I managed to complete the jobs successfully.
Finding a Solution for the Sunroom
When I visited the homeowner’s sunroom, I found that it was made entirely of glass, leaving me with only two walls where I could potentially install the mini-split system. One of the walls was out of the question because it would have been difficult to get power from the panel in the garage to that side of the house. The homeowner had been experimenting with ideas and suggested going through another wall into the dining area of the kitchen, but I didn’t think that would look great.
Upon further inspection, I noticed a discrepancy in the roofline of the house compared to the rest of the structure, leading me to ask the homeowner about the area above the kitchen. They explained there was a small attic space with a knee-wall, which was perfect for our needs.
Installation Process
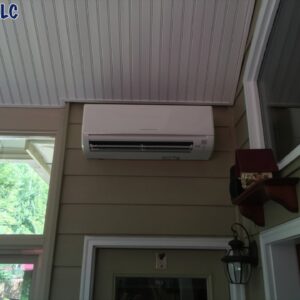
To install the mini-split system, we had to run the line set and the drain line into the attic space, which involved cutting holes in the wall and careful maneuvering through the soffit. The main issue we encountered during installation was the soffit level being higher than the ideal location for the mini-split, which required us to use a condensate pump to manage the drainage.
Initially, the homeowner was concerned about potential leaks, but we assured them that the pump had a float switch and safety feature that would prevent any issues.
We ran the line set through the attic about 30 feet and then down the wall to connect the mini-split system.
Final Thoughts
While we were pressed for time and unable to capture the entire installation process on video, we hope that sharing our experience here can be helpful to others who may be facing similar challenges with mini-split installations in sunrooms or other atypically-designed spaces. Each job has its own unique difficulties, and finding a solution requires creativity and ingenuity.

