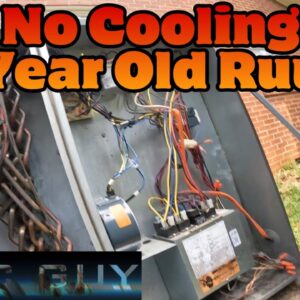
Troubleshooting a Condenser Fan Motor that is Not Turning
Hey guys, we have a situation here where the fan condenser motor is not turning, even though the compressor is running and it sounds like the blower is running too. Let’s dive into the problem and see what we’ve discovered.
Identifying the Motor and Checking the Voltage
It turns out we’re dealing with an x13 condenser fan motor. Before we start troubleshooting, we have to ensure that the motor is receiving the right voltage. For this, we’ll need to check if there’s a 24-volt signal coming to the motor. This will help us determine whether the fault lies in the motor itself or if we need a new defrost control board.
We can start by locating the grounded common wire, which is connected to the board. From there, we will check if there’s 24 volts between the contactor, which has been disconnected for safety reasons, and the blue common wire that powers the fan motor.
After checking both sides, we confirm that there is indeed 24 volts being supplied to the motor. From what we can see, the brown and black wires should be running straight to the contactor. Thus, the motor is getting both voltage and a call, which means there’s an issue with the motor itself.
Motor Replacement is the Next Step
In this case, we can’t simply replace the module, so there’s no point in taking out the motor only to put it back in again. The best course of action is to get a new motor.
Replacing the Condenser Fan Motor
While we wait for the new motor, let’s take a moment to appreciate the docile nature of the Great Dane that’s watching over the scene – a true testament to their reputation as gentle giants.
Once we have the new motor in hand, it’s time to get down to the nitty-gritty of replacing it. We’ll start by disconnecting the wires connected to the old motor:
1. The 24-volt wire
2. The common wire
3. The ground wire
With these disconnected, we can then remove the old motor and begin installing the new one.
Connecting the New Motor
Now that we have the new motor in place, it’s time to connect the wires. Here’s a quick rundown of the steps:
1. Start by connecting the 24-volt wire.
2. Next, connect the common wire.
3. Finally, connect the ground wire to its designated location.
With all the wires connected and secured, it’s time to clean up the workspace and reattach the contactor. Once that is in place, we can restore power to the unit and see if our efforts have paid off.
Success! The Fan Comes Back to Life
As soon as we restore power, the fan springs into action – something it wouldn’t do before. We can now wait for the compressor to come on and confirm that everything is running smoothly. With the compressor running and the air feeling nice and cold, we can consider this job a success.
Wrapping Up the Condenser Fan Motor Replacement
In conclusion, the issue with the condenser fan motor not turning was due to a faulty motor. By checking the voltage supply and conducting a thorough inspection, we were able to pinpoint the problem and replace the motor.
Troubleshooting and replacing a condenser fan motor can be a challenging task, but with attention to detail and a systematic approach, you can successfully restore your unit to optimal performance. We hope this information was helpful, and as always, thanks for watching and keep an eye out for the next installment in our HVAC troubleshooting series!

