Installing a Ductless Mini Split for Optimal Climate Control in Your Home Gym
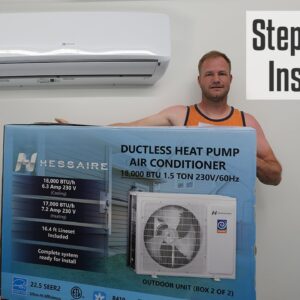
Installing a ductless mini split system provides an efficient and versatile way to control the temperature in your home gym. In this guide, we’ll walk you through the process of installing a 1.5-ton Hess Air brand mini split from Home Depot. While specifically tailored for this particular model, these instructions can be applied to various sizes and brands of ductless mini split systems. Even though our focus is on installing the mini split system in a home gym, the procedure remains the same for any room requiring additional climate control.
Mounting the Indoor Unit
The first step in installing a ductless mini split system is to securely mount the indoor unit’s bracket on the wall of your chosen room. Following the manufacturer’s guidelines, locate a suitable spot on the wall, ensuring the unit’s optimal operation and desired performance. Once the mounting plate is firmly attached to the wall, proceed to connect the signal wires, the drain, the high side, and the low side in accordance with the included instructions.
Drilling the Hole
Next, drill a hole through the wall, taking note of the dimensions specified in the unit’s manual. Ideally, use a slightly downward angle to avoid sharp bends in the copper lines. Make sure that the hole’s diameter is adequate and centered. If you’re unsure of the correct size, consult the installation instructions or check with the manufacturer. Remember that you may need a longer drill bit or an extension to drill through both the drywall and external material, such as stucco, brick, or wood.
Feeding the Lines through the Wall
Feed the power, the drain, the high side, and the low side through the hole in the wall before mounting the indoor unit to the bracket. Be cautious when bending the lines, as they can become damaged if handled improperly. It’s advisable to have a second person assist with this step to ensure a smooth and successful installation.
Connecting the Lines
After feeding the lines through the wall and mounting the indoor unit, proceed to connect the drain, the high side, and the low side lines. Make sure to follow the manufacturer’s instructions on which fittings to use, how to correctly attach them, and the appropriate tightening processes to avoid damaging the copper or compromising the connections.
Setting up the Outdoor Condenser Unit
The installation process continues with positioning and connecting the outdoor condenser unit. Ensure that the unit is placed on a stable, level surface and utilizes insulated pads to minimize vibration and noise. After situating the outdoor unit, route the lines and the signal wires to their corresponding connections. Make certain that the connections are secure and well-sealed, and that each connection corresponds with its designated spot according to the manual.
Providing Power to the Mini Split System
Finish the installation by providing the necessary power supply to the mini split system. If you don’t feel comfortable doing this portion of the installation, consult with or hire a professional electrician. With the system connected, double-check all connections and seals to verify that they are secure and free of leaks.
Preparing the System for Use
As a final step, use a vacuum pump to remove any air or moisture from the lines. This helps ensure that the system operates at peak performance and functions effectively as it cools the home gym. Once satisfied with the vacuum process, open the valves fully and confirm that the connections are tight and well-sealed. Finally, if the installation is deemed successful, turn on the mini split system and enjoy the comfort it provides in your home gym.
Conclusion
A well-executed installation of a ductless mini split system adds flexibility and efficiency to your home’s climate control, creating the perfect environment within your home gym. Although these directions predominantly target the installation of a 1.5-ton Hess Air brand mini split, the guidelines can be adapted to various sizes and brands. With diligence, attentiveness to detail, and adherence to the manufacturer’s instructions, you can benefit from a comfortable, well-conditioned home gym. Remember, if necessary, consult a professional electrician or HVAC technician for guidance or assistance.

