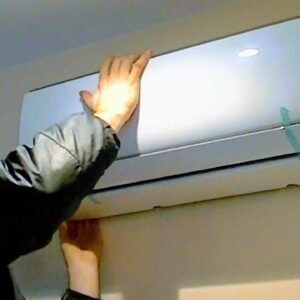
Installation of a Split Air Conditioner System in Your Office
When it comes to keeping your office space comfortable all year round, a split air conditioner system can provide both heating and cooling functions. For this project, I will install a 9,000 BTU 2.6 kW precharged inverter kit, which boasts energy-saving capabilities, quiet operation, and several additional features. Read on to learn how to complete the installation process yourself.
Key Features of the Precharged Inverter Kit
Aside from providing heating and cooling capabilities, the manufacturer claims this air conditioner system includes an antibacterial coating on the fins, uses an environmentally friendly refrigerant, and can be controlled via WLAN with a smartphone app. The inverter kit comes with a prefilled coolant unit, nine feet of refrigerant piping, and smaller parts such as a feed-through tube, insulation tape, sealant, and rubber mounts. Additionally, this kit includes both an indoor and outdoor unit.
Installing the Indoor Unit
To install the indoor unit, first measure the distance between the holes on the wall bracket and the outer edge. Keep a minimum distance of 6 inches from the ceiling for proper airflow. Use a level to mark the height of the upper holes and detach the wall bracket from the plastic unit. Mark all holes using the bracket before drilling with a 5 mm masonry drill and Bosch Hammer. To cut down on dust, use a Kärcher wet & dry vacuum cleaner while drilling. Rawl plugs and screws may not be included.
Drilling the Wall Hole
Next, mark the position of the hole by following the installation manual’s guidelines. Use a long masonry drill to pre-drill a shank hole angled on a downward slope. Switch to a 65mm concrete shank drill bit and drill from the inside out as far as possible. Align the inner and outer holes before proceeding to connect all cables and wires to the unit. Use the provided cables for easy connection. Be sure to connect coolant lines to the inside unit and only bend the connections once to prevent breakage. Follow the manual’s guidelines for torque wrench settings while connecting the lines.
Connecting Lines and Mounting the Indoor Unit
Connect the condense water line and bundle all lines together with insulation material and thin plastic tape. With the help of another person, push the bundle through the drilled hole and carefully pull from the outside, positioning the indoor unit near the wall. Hang the unit on the wall bracket plate and move to the outdoors
set-up.
Installing the Outdoor Unit
Seal gaps in the concrete wall with insulating foam spray and neoprene compound, securing the refrigerant lines in place with 3-inch PVC pipes. Cut a hole in the pipe for the water to escape onto the roof. Mark the positions for the outdoor unit bracket rails and mount them securely with 14mm rawl plugs and screws. Ensure its stability by attaching the unit to the bracket with anti-vibration feet.
Connecting Power and Final Touches
Run a separate power wire from the house fuse box to the outdoor unit, covering it with an on-wall cord for protection. Make sure all connections are correctly marked and in place for optimal operation. Connect the copper lines using the same method as the indoor unit. Pull a vacuum in the lines before allowing the factory-filled coolant to flow into the system.
Operating the Split Air Conditioner System
With the installation complete, turn on power to the unit and test its various modes using the provided remote control. The system should operate with low noise and efficiently maintain a comfortable temperature in your office space.
Disclaimer
In some countries, the law requires that a certified company conduct the installation of an air conditioning unit. Be sure to check your local regulations before proceeding with installation.
Conclusion
Installing a split air conditioner system can be a DIY project if you feel confident working with tools and equipment. Follow the steps outlined in this guide to enjoy a comfortable climate in your office all year round. Remember to consult your local regulations before conducting any installation, and note that this video was not sponsored, and the unit and necessary tools were purchased from Amazon. Thank you for your support!

