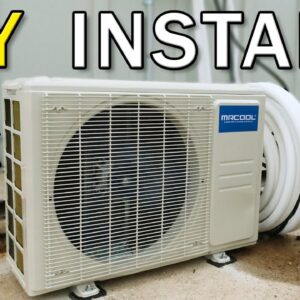
Effortless Installation of a Mini Split System
Introduction
Welcome to Seth Craft, where in this content, I will walk you through the entire process of installing a Mr. Cool DIY 12,000 BTU Mini Split system in a 10×12 shed. This efficient and economical unit is perfect to provide climate control and enhance the comfort level within the space. Continue reading to explore the intricate steps of this installation and learn how you too, can successfully install a mini split in your space.
Indoor Unit Preparation
To start, let’s discuss the mounting template provided with the Mr. Cool DIY Mini Split system. This template will be used for leveling and marking the holes for the indoor unit’s bracket attachment, as well as the hole for the power cable and drainage lines. Accurate measurements are crucial to ensuring that the indoor unit is securely mounted.
Use a level to draw an aligned marking of the template on the wall within the room, and then drill the required holes. Extract the mounting bracket from the inner unit, affix it to the wall, and properly secure it with appropriate screws.
Now it’s time to create the hole through which the refrigerant lines, power cable, and drain line will run. Carefully angle a hole saw downward, which allows for effective drainage of condensation. If required, you may need to make certain adjustments, such as trimming the plastic sleeve, to fit the hole into the wall.
Indoor Unit Installation
Feed the refrigerant lines, drain line, and power cable through the hole in the wall, attaching them securely to the indoor unit. After ensuring that these connections are tightly affixed, mount the indoor unit to the bracket previously installed, locking it in place.
Outdoor Unit Preparation and Installation
With the indoor unit completed, the attention shifts to the outdoor unit. Make sure there is a minimum of one foot of clearance between the outdoor unit and the wall. Measure and mark out the positions where the legs of the outdoor unit will rest. Using a hammer drill, create holes in the concrete surface so that wedge anchors can be placed.
Secure the outdoor unit to the concrete by tightening the wedge anchors, ensuring that the rubber footings are in place. This restraint will provide stability and prevent any undesired vibration.
Connecting the Refrigerant Lines
The next step is to uncoil and connect the refrigerant lines. Exercise caution while uncoiling to avoid any kinks in the lines. Attach the lines to their respective connectors on the outdoor unit, and check for any leaks using a soapy water solution. If there are no bubbles, that indicates a secure connection.
Electrical Connection
Now it’s time for the electrical connection. First, connect the numbered wires from the indoor unit to the outdoor unit, following the provided instructions. Utilize a single 20-amp breaker for a 120-volt connection, running it through a flexible conduit from the breaker panel.
Connect the ground, neutral, and load wires properly to their respective positions in the breaker. Reinstall the breaker panel cover, ensuring that the electrical connection is safe and secure.
Testing the Mini Split System
With the electrical connection complete, you are now ready to test your mini-split system. Turn on the breaker controlling the mini split and observe the performance of both the indoor and outdoor units. If they operate smoothly with no anomalies, you have successfully installed your Mr. Cool DIY Mini Split system.
Final Touches
Subsequently, you can focus on wrapping the exposed lines with insulation, sealing the hole, and placing a channel around the wires for a neat and tidy install. Effectively arranging the drain line helps secure it and directs condensation away from the foundation of your building.
Conclusion
The intricacies of installing a Mr. Cool DIY Mini Split system are easy to navigate with the help of this comprehensive guide. By adhering to these steps and exercising precision and care, you can ensure a successful, professional-grade installation that provides your space with optimal temperature control and comfort. Remember, the key to a seamless and long-lasting installation lies in your attention to detail and the use of high-quality materials. Happy installation!

