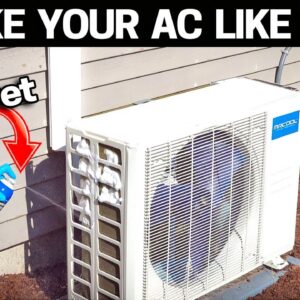
Understanding the Charm of Mini Split Systems
Among the myriad of heating and cooling systems available, my affection for mini split systems, particularly the Mr. Cool model, is unwavering. These compact units operate with remarkable efficiency, yet they harbor a common flaw: an Achilles’ heel, if you will. The performance of these systems hinges crucially on unobstructed airflow to the outdoor unit. Any hindrance in this airflow can result in diminished cooling performance, inflated energy costs, and potentially catastrophic system failures.
The Importance of Maintenance
Maintaining your mini split system is not just important; it is essential for longevity and optimal functionality. Unlike traditional HVAC systems, DIY mini splits lack routine service calls from professional technicians, placing the onus of basic upkeep squarely upon the homeowner. If you wish to extend the lifespan of your cooling unit, regular cleaning is paramount.
Two Approaches to Cleaning Your Mini Split System
In this guide, I will outline two distinct methods for cleaning your mini split system. The first method is exceptionally straightforward, leaving little room for excuses for neglecting maintenance tasks. The second method, while slightly more complex, provides a more exhaustive cleaning, ensuring your system runs at peak performance.
Preparation for Cleaning
Before diving into the cleaning process, it’s crucial to ensure the system is powered down adequately. Begin by inspecting the surroundings of your unit, especially at the rear, where debris and leaves tend to accumulate. Using your hands, remove any visible obstructions. Think of your mini split as akin to a car radiator, with delicate fins that can easily bend if not handled with care. Avoid touching them directly, as any unnecessary pressure may cause permanent damage.
Accessing the Interior Components
The cleaning process does not necessitate disassembling the entire unit. Ideally, you should focus on removing the top cover, granting access to the internal components requiring attention. Generally, you will find a couple of exposed screws, which should be your primary focus. Avoid using pry bars or excessive force, as this could lead to irreversible harm.
After loosening the visible screws, attempt to gently lift the lid. If it resists, it is an indication that you may have overlooked an additional screw. Keep an eye out for hidden screws, especially beneath the electrical cover, as these are frequently the culprits holding the lid in place.
Assessing the Interior for Debris
Once the lid is removed, the accessibility it provides is invaluable for thorough cleaning. The base of the unit will likely reveal a collection of leaves, mulch, and other debris — the first target in your cleaning endeavor. Remove these materials by hand to set the stage for a deeper clean.
Choosing the Right Cleaning Solution
For the next phase, selecting a cleaning solution specifically formulated for air conditioning systems is vital. While dish soap can suffice, specialized cleaners designed for HVAC systems mitigate concerns regarding residue and effectiveness. For the purpose of rinsing, garden hoses prove to be indispensable, allowing you to push out stubborn dirt effectively.
Applying the Cleaner
When applying the cleaning solution, it’s wise to don gloves for protection. Start at the top of the unit and apply the foam cleaner directly into the fins. As the foaming action kicks in, it will work to lift away dirt and grime. Be methodical; focus on all accessible areas, spraying liberally but judiciously.
Rinsing the Coil
After allowing the cleaner to sit for fifteen minutes, it’s time to rinse. Begin at the top of the unit, employing your garden hose. Generously spray, allowing the water to flush out the cleaner and any accumulated debris. The benefits of removed topside cover become apparent as you can rinse from both inside and outside. Watch as the water carries away the foam and the grime, revealing a significantly cleaner unit.
The Cost-Effectiveness of DIY Maintenance
The expense of hiring a professional to perform a thorough cleaning can easily reach $400, and often, outside units are overlooked entirely. This oversight could stem from a myriad of reasons, such as a lack of awareness concerning the necessity of cleaning external units. Yet, industry guidelines recommend that thorough cleaning occurs at least twice annually for systems that operate year-round. In colder climates, an annual cleaning may suffice.
Reassembling the Unit
Once the rinsing is complete and any visible debris has been removed, carefully replace the cover. It’s essential to ensure the cover is aligned correctly, as misalignment can complicate securing it. Pay heed to any indicators on the unit, such as arrows denoting the front and back, to make reassembly more intuitive.
Alternative Cleaning Methods
If the idea of dismantling the unit feels daunting, there is still hope. Utilizing the garden hose and foam cleaner, you can still address the external components. Spray what you can see, focusing on the back. However, if your unit has endured the grind of time—exceeding five years—do not be surprised if a substantial buildup of grime lurks within the unit, necessitating a more in-depth cleaning that only removing the cover can achieve.
Final Steps: Letting Your Unit Dry
Post-cleaning, patience is a virtue. Before reactivating the power, allow the unit to dry sufficiently—at least an hour is recommended. Once adequate time has elapsed, flip the switch, and your system should operate like new again.
With these simple yet effective cleaning strategies, your mini split system can provide efficient, reliable cooling for years to come. Maintaining your unit not only enhances its efficacy but also cuts down on energy costs, making it a win-win for any diligent homeowner.

