Preventative Maintenance Process for Ductless Systems
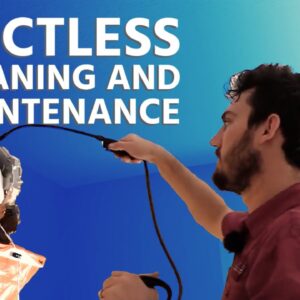
In this article, we will walk you through the specifics of how we at Kalo Services carry out our preventive maintenance process focusing on a ductless system.
Starting Up The Process
Our team always carries a tool pouch that houses all the necessary tools we will need for the maintenance process. In this particular case, we will be using a ‘dissolve kit’ to clean the coil and other parts of the ductless system. This kit will also be used to thoroughly clean the evaporator coil and the housing of the system without having to dismantle the entire system, saving both time and effort.
Our preventive maintenance plan includes an agreement to pull and clean the actual blower wheel during every visit. As the ductless system is located in the master bedroom for this particular customer, cleanliness is a high priority.
Setting Up The Dissolve Kit
The dissolve kit comes with a cleaner that can be diluted up to a ratio of four parts water and one part cleaner. It also consists of a support bracket that hooks up to the back portion of the ductless unit, a bib, and a cleaning brush. The bib is used to catch the dirty water that flows out when the coils are cleaned, minimizing mess.
Pre-Cleaning Process
Before starting the cleaning process, certain parts like the washable filters, movable veins, housing plates, and drain pan need to be removed. These parts are then cleaned separately before being reintroduced into the system.
Cleaning The Blower Wheel
Next, we pay attention to the blower wheel and the coil. A ‘set screw’ is loosened and the blower wheel is carefully taken out to be cleaned separately. This is important as over time, due to usage, the blower wheel collects dirt and this buildup can affect performance.
Using The Dissolve Kit
The dissolve kit is used during these stages, where we focus on cleaning the evaporator coil which can have buildup of algae and dirt over time, leading to reduced performance.
Post-Cleaning And Assembling
After we are done cleaning the coils, we let them dry, and then we follow a reverse process to put everything back into place. This begins with putting the blower wheel back in and then slowly the other parts, making sure each fits back into their respective places.
Checking System Operation
Once the cleaning and assembly are completed, we then proceed to confirm the system is functioning correctly. With the help of our 605 eyes, we check the correct BTUs are being delivered, ensuring the proper cooling power of the unit.
Outdoor Unit Check
Next, we move to the outdoor unit. We begin by taking the line temperature of the suction line as well as the expansion line. To ensure no loss of charge, we use tools like the 549 eye that can hook up right to the service port.
As with any system, making sure everything is working correctly is essential, so we button it all back up, then confirm proper drainage on the exterior of the home.
Conclusion
So this process, as detailed above, is Kalo Services’ preferred method of preventative maintenance for ductless systems. Our main focus is on thorough cleaning, proper reassembly, and confirming the system operates correctly. Using devices like our dissolve kit, we ensure a quality service with minimal mess. This preventive maintenance not only helps in extending the lifespan of the system, but it also helps in reducing energy consumption, leading to significant savings for homeowners. Our commitment to being thorough and efficient hopefully serves as an example of best practice in preventive maintenance for ductless systems.

