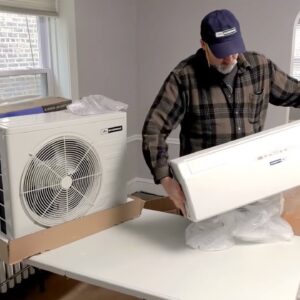
Introduction to Blue Ridge Ductless Mini-Splits
A Blue Ridge ductless mini-split is a remarkably efficient solution for heating and cooling your home. These innovative systems are ideal for additions, garages, or rooms where ductwork is unavailable. With their energy-efficient performance, quiet operation, and ease of installation, mini-splits are becoming increasingly popular among homeowners.
The mini-split system comprises two primary components: the indoor air handler and the outdoor condenser. These components are connected via copper tubing, enabling the necessary refrigerant to circulate throughout the system. Moreover, a handheld remote allows you to have thermostatic control over the system.
While you can complete the majority of the installation process on your own, it is highly recommended that a trained professional carry out the final 10% of work. This is crucial in ensuring maximum performance and energy savings from your Blue Ridge mini-split.
Preparation for Installation
Before commencing the installation, make sure you have all the necessary parts as specified in the installation manual. Carefully inspect these components for any defects before you begin.
To complete the installation, you’ll need the following tools:
– Adjustable wrench
– Torque wrench
– Hex keys or Allen wrenches
– Electric drill with drill bits and a hole saw
– Utility knife
– Wire cutter and stripper
– Phillips and flat blade screwdrivers
– Level
– Safety glasses and work gloves
A professional installer will bring additional tools, such as manifold gauges, vacuum pumps, flaring tools, and a dry nitrogen tank with a regulator.
Indoor Air Handler Installation
To begin, select a spot on the wall where the air handler will be installed. This location should:
1. Be free of obstructions.
2. Be near air inlet and outlet points.
3. Be at least six feet above the floor.
Once you’ve selected the optimal location and considered any additional placement tips provided in the manual, remove the wall bracket from the back of the air handler.
Place the bracket against the wall, using a level to ensure it is horizontally aligned, and mark the screw holes using a pencil. Drill pilot holes at the marked positions, securing the wall mounting frame with self-tapping screws and anchors.
After attaching the wall mounting frame, create a hole in the wall allowing refrigerant lines, control wires, and condensation drains to pass through. This hole should be angled slightly downward for proper drainage.
Configuring the Air Handler and Connections
Some adjustments may be necessary to configure the air handler to your specific application. For instance, if the siding is on the right side of the unit, you may need to switch the positions of the refrigerant piping and the drain tube. The installation manual will provide detailed instructions on carrying out these adjustments.
Next, prepare the control wire by pushing it through the designated inlet hole on the air handler and pulling it through the front. Now, carefully unfold the refrigerant pipe, making sure not to bend or crimp the copper tubing. Temporarily secure the wiring, refrigerant lines, and drain tubing together with electrical tape.
Using the assistance of an optional support bracket or a helper, lift the air handler into position, feeding the wired and tubing through the wall opening. Slide the air handler onto the wall mount, ensuring a secure fit.
Finally, make connections between the multi-conductor wire and associated terminals within the air handler, double-checking that the color-coding matches correctly.
Outdoor Condenser Installation
The outdoor condenser unit can be installed on a ground pad, exterior wall brackets, or on a rooftop. In this guide, we will focus on pad installation, as it is the simplest and easiest method.
Securely mount the outdoor unit onto the pad, using bolts to affix it in place by threading them through the footholds. After mounting the condenser, connect the flared copper ends of the line set to the pipe joint that leads to the air handler.
A trained professional should step in at this point to complete the installation, particularly for tasks such as cutting, flaring, and connecting the copper pipes. The technician will also perform a pressure test to check for and address any potential leaks, following up with vacuuming to remove all air and moisture from the lines.
Finally, the professional will establish the 220-volt power supply to the outdoor condenser, typically through an exterior-mounted manual disconnect box, connected to a dedicated circuit breaker in your breaker panel.
Starting Your System
With all high-voltage and low-voltage connections complete and the refrigerant released, it’s time to power up the system. Using the remote control, initiate the initial startup, and check for proper operation.
Conclusion
Congratulations, you have successfully installed your Blue Ridge ductless mini-split system! These highly efficient heating and cooling units, available exclusively from www.alpinehomeair.com, offer an ideal solution for homeowners seeking a versatile and energy-efficient option for their homes. Thanks to their outstanding performance, user-friendly installation, and factory-direct pricing, Blue Ridge mini-splits have become the highest-rated brand on the internet.

