Introduction
Today, we are going to discuss one of my favorite projects – installing air conditioning. Specifically, we will be looking at the Mr. Cool split ductless AC system. This system is perfect for DIY enthusiasts since it has been designed with ease of installation in mind, making it a surprisingly straightforward process.
Choosing Indoor and Outdoor Unit Locations
The first thing to keep in mind when planning your installation is where to place both the indoor and outdoor units. The indoor unit should be mounted in a well-ventilated area. The outdoor unit location should be away from direct sunlight and have proper drainage for the condensate that is generated during operation.
Mounting the Indoor Unit
To begin, you will need to consider the best location for your indoor unit. In our example, we have chosen the corner of a room above a garage that tends to be the hottest area in the house. The Mr. Cool system includes an indoor unit with electric louvers that help circulate cool air around the room, making it perfect for this type of space.
Mounting the Outdoor Unit
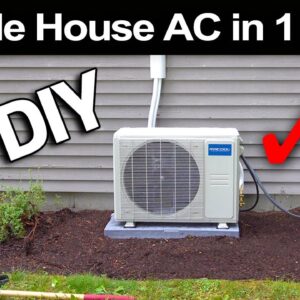
Next, you will need to decide where to place the outdoor unit. Mr. Cool offers two mounting options – wall mounting or ground mounting. In this guide, we will be using ground mounting as we already have a solid base in place.
Step 1: Make a Hole for the Hoses
Mr. Cool provides a cardboard template and hole saw to make it simple to cut the hole needed for the hoses. First, you will need to cut through the drywall and then use an extension bit to create a pilot hole on the outside of the wall. Next, cut the same hole from the outside in, taking care not to damage any external finishes.
Step 2: Affix the Bracket
Once you have cut the hole, locate the bracket and remove it from the back of the indoor unit. Check that the bracket lines up with your template before fixing it to the wall, ensuring it is level and securely attached.
Step 3: Attach the Indoor Unit to the Bracket
After the bracket is in place, you can now attach the indoor unit. Make sure to uncoil the electrical wire and hoses before carefully lifting the unit onto the bracket, hooking the top of the unit onto the bracket, and snapping the bottom into position.
Step 4: Uncoil and Connect Refrigerant Lines
With the indoor unit mounted, carefully uncoil the refrigerant lines and hand thread the connections on the outdoor unit. It is essential to use two wrenches when tightening these connections to prevent damage to the lines.
Step 5: Wire the Outdoor Unit
To wire the outdoor unit, first, connect the wiring from the indoor unit, followed by the wiring from the AC service disconnect, ensuring all connections are securely tightened. Replace the cover after all connections are made.
Step 6: Trim Kit Installation
Mr. Cool offers a convenient trim kit that helps to disguise the hoses and wiring, ensuring a neat and professional finish to your installation. Simply attach the plastic track behind the hoses, followed by the trim pieces that snap onto the front. You can leave these white or paint them to match your home’s decor.
Step 7: Connect the Smart Feature
Included with your Mr. Cool system is a handy USB key that transforms your air conditioning unit into a smart device. Simply plug this into the unit’s cover and connect it to your home’s Wi-Fi network, allowing you to control the system from anywhere.
Step 8: Complete Small Finishing Touches
Finally, take the time to complete any small finishing touches to your installation. Install the supplied sound deadening pads, ensure the condensate hose is unobstructed, and give everything a final check.
Conclusion
Congratulations, you have successfully installed your very own Mr. Cool split ductless AC system! This user-friendly system offers a great way to add air conditioning to your home without the need for extensive retrofitting or professional assistance. Set some time aside and enjoy the satisfaction of completing this project yourself and reaping the rewards of a cool, comfortable home.

